Flying Geese are a very common quilt block, but some people can be intimidated by triangles. I'm here to help! Flying geese look great in north woods quilts (like this one) as well as modern quilts. It's a great block that you should add to your quilting tool box. So, let's get started!

Flying geese are comprised of two prints: one print for the goose (the large triangle) and one print for the sky (the two small triangles).

First, you need to decide what size you want our flying geese to finish at. The width of the flying geese should be two times the height of the flying geese. For example: 2" by 4" or 3" by 6". The flying geese that I am making will finish at 3" by 6".
Now that you know what size you want your geese to finish at, you can determine how big to cut our pieces. To determine the cutting measurements for the goose (the large rectangle) add 1/2" to the height and width of the finished rectangle. For example: my large rectangles will be cut at 3 1/2" by 6 1/2".
To determine the cutting measurements for the sky pieces (the smaller squares) add 1/2" to the height of the finished rectangle. For example: my sky squares will be cut at 3 1/2" by 3 1/2". You'll need two sky pieces for every flying geese block you'd like to make.
Once you have our pieces cut out, mark a diagonal sewing line on the back of the sky squares. This is an important step for accurate flying geese. Even if you think you can "eyeball" it, you will get better, more consistent results if you take the extra time to mark your sewing lines.


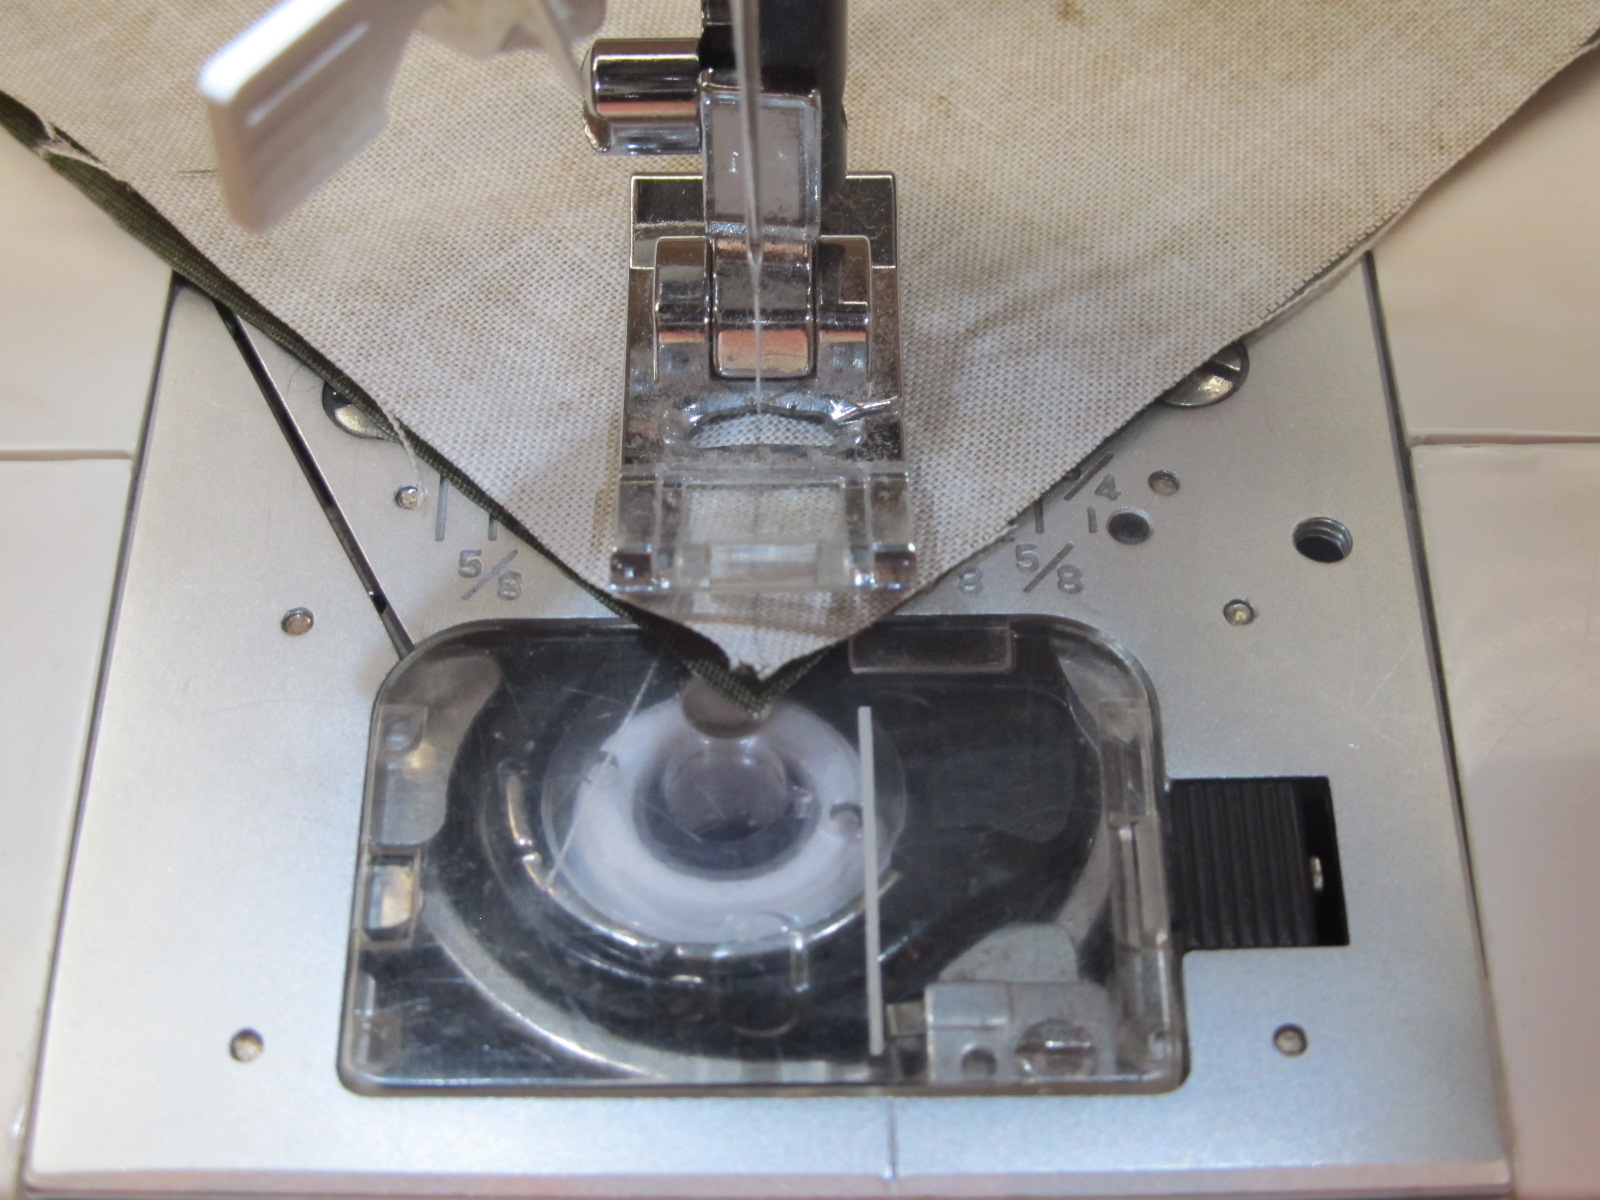
Now, let's get to sewing! Set a marked square on top of a large goose rectangle with right sides together. Be sure that your edges are aligned accurately. Sew along the marked sewing line.

TIP: To avoid bird's nests and crumpled corners, start your seam in the middle of the rectangle and sew out towards the point. By starting your stitch in a place where there is more fabric for your feed dogs to catch, you'll avoid that annoying bunching.


Line up the 1/4" inch mark of your ruler along the line of stitches you've just sewn and cut away the extra fabric. This will leave you with a 1/4" seam allowance on your flying geese and two scrap triangles. (You can sew these half square triangles together to use elsewhere so that you don't throw away you're valuable fabric scraps!)


Cut apart your rectangles and bring them back to the cutting board for trimming.


Bring your pieces back to the ironing board once more. Fold the sky triangle out and press, making sure your seam allowance is pressed towards your sky piece.


They are now adorning the edges of my north woods quilt.

Your flying geese don't have be just a decorative border or block on your quilt. They can also be the main feature! Let your imagination carry you. There are so many beautiful uses for flying geese. I would love to see how you use yours!

Flying geese are comprised of two prints: one print for the goose (the large triangle) and one print for the sky (the two small triangles).

First, you need to decide what size you want our flying geese to finish at. The width of the flying geese should be two times the height of the flying geese. For example: 2" by 4" or 3" by 6". The flying geese that I am making will finish at 3" by 6".
Now that you know what size you want your geese to finish at, you can determine how big to cut our pieces. To determine the cutting measurements for the goose (the large rectangle) add 1/2" to the height and width of the finished rectangle. For example: my large rectangles will be cut at 3 1/2" by 6 1/2".
To determine the cutting measurements for the sky pieces (the smaller squares) add 1/2" to the height of the finished rectangle. For example: my sky squares will be cut at 3 1/2" by 3 1/2". You'll need two sky pieces for every flying geese block you'd like to make.
Once you have our pieces cut out, mark a diagonal sewing line on the back of the sky squares. This is an important step for accurate flying geese. Even if you think you can "eyeball" it, you will get better, more consistent results if you take the extra time to mark your sewing lines.

Line up your ruler from one point of the square to the opposite point, and using a marking pencil, chalk liner, or even a pencil, draw a line from one point of the square to the other.

Now, let's get to sewing! Set a marked square on top of a large goose rectangle with right sides together. Be sure that your edges are aligned accurately. Sew along the marked sewing line.

TIP: To avoid bird's nests and crumpled corners, start your seam in the middle of the rectangle and sew out towards the point. By starting your stitch in a place where there is more fabric for your feed dogs to catch, you'll avoid that annoying bunching.
Stop stitching approximately 1/4" before the corner and get your next set lined up to be sew.

Chain stitch your rectangles together, continuing to start from the middle of the rectangle and sew out towards the point and your geese should be coming together nicely!

Cut apart your chain and bring your blocks back to the cutting board.

Line up the 1/4" inch mark of your ruler along the line of stitches you've just sewn and cut away the extra fabric. This will leave you with a 1/4" seam allowance on your flying geese and two scrap triangles. (You can sew these half square triangles together to use elsewhere so that you don't throw away you're valuable fabric scraps!)

Now, to the iron board! Fold out the sky triangle and press. The seam allowance on your flying geese should always go out towards the sky triangles to avoid bulk.


And back to sewing machine! Take a second sky square and align it with the opposite edge of the rectangle from the first one. Be sure your marked sewing line comes to a point with the first triangle. The two sky pieces should overlap slightly to account for seam allowances.


Use the same technique for chain stitching your blocks together, starting in the center of the rectangle and sewing out towards the point to avoid bird's nests and bunching.

Cut apart your rectangles and bring them back to the cutting board for trimming.

Once again, align the 1/4" mark on your ruler with your stitching line and cut away the extra fabric. You'll be left once again with a 1/4" seam allowance and a couple more scrap triangles.


Bring your pieces back to the ironing board once more. Fold the sky triangle out and press, making sure your seam allowance is pressed towards your sky piece.


Once you have pressed each piece, you should have a lovely stack of flying geese!

You can lay them out and use them however you'd like! I chose to sew mine in a straight column with all the geese pointing in the same direction.

They are now adorning the edges of my north woods quilt.

Your flying geese don't have be just a decorative border or block on your quilt. They can also be the main feature! Let your imagination carry you. There are so many beautiful uses for flying geese. I would love to see how you use yours!
Comments
Post a Comment