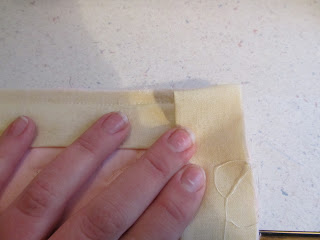
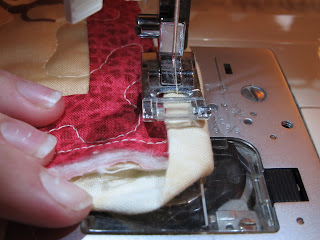
I've wanted to create a binding tutorial for a while. Especially for the ladies that come to my class as this seems to be an ongoing struggle for them. I hope that the rest of you can benefit from this tutorial as well!
Creating your binding
Measure around the entire outer edge of your quilt and then
add 20 inches to this measurement.
Divide this total by 40.
This new number is the number of strips that you need to cut. If you came up with a decimal, round your
number up to the next whole number. For
example, if your result was 7.6, round up to 8.
Cut that total number of strips measuring 2.5” wide x the
width of fabric.
To connect your strips together, make the seam on the
diagonal. Lay the first strip right side
up and the second strip on top with right sides together, perpendicular to the
first strip. Sew on the diagonal from
point to point.
Trim off the excess 1/4" from the seam line.
Repeat this until you have one continuous strip of fabric.
Press this strip in half lengthwise with wrong sides
together like a long hot dog bun.
You have now prepared your binding to be attached to your
quilt!
Attaching your binding (Directions for machine sewing your
binding)
Start in the middle of one side of your quilt. Align the raw edges of your binding with the
raw edges of the back of your quilt sandwich.
Stitch with a ¼” seam allowance. Leave a long tail of about 10” before
you begin stitching your binding down to help you later.
When you get to a corner, stop your stitching ¼” before you
get to the edge of the quilt.
Remove quilt from the machine.
Lay the binding out so that it extends straight beyond the quilt edge.
Fold the binding up so that it creates a 45 degree angle at the corner and the raw edges of the binding extend upward from the quilt and remain in line with the next edge of the quilt to be bound.
Fold the binding back down on to the quilt. The fold of the binding should match up with
the top edge of the quilt and the raw edges should come back down to once again
align with the raw edges of the quilt.
Begin stiching again at the corner.
Repeat these steps for each corner.
Once you get back to the side in which you started your
binding, stop stitching approximately 10 “ from the beginning stitch and leave
a long tail free from the quilt once again.
Connecting your binding
Lay the first tail down across the gap and cut the tail off
so that it ends in approximately the middle of the gap.
Lay the second tail down on top of the first tail. You want
the tails to overlap each other a total of 2.5”. Using your ruler or a hem
guide, align the end of your measuring device with the end of the first tail
and cut the second tail at the 2.5” mark.
Open the tail on the right and angle it off of the quilt
top. Lay it down with the right side
up.
Open the tail on the left and angle it off the quilt top to
lay it right sides together at an angle with the first tail. This will be a
tight fit and you will need to fold in the left side of the quilt to help give
you enough room to get these two pieces aligned. Pin.
Sew on the diagonal from point to point.
Straighten out the quilt edge and make sure that your
binding is going to lay down nicely over the gap.
If your seam was done correctly, pull the binding back out
and trim the excess ¼” away from the diagonal seam.
Lay your binding back down onto the quilt and finish sewing
the binding seam.
Finishing your Binding
Turn your quilt over to the right side and pull the binding
around to the top.
Starting at one corner, overlap the folded edge of the
binding with the straight stitching line that is securing it to the back and use
a decorative stitch to sew your binding by machine. Start your stitch with a
couple back stitches to secure it, and keep your stitch on the edge of your
binding for the most secure edge. You’ll want to choose a stitch that looks the
same on both sides. Some of the very
ornate stitches are unrecognizable on the reverse side, so test out a few on a
scrap of paper before you start using it on your quilt.
I prefer to use this stitch.
It was recommended to me by a shop owning friend and I have yet to find
a stitch that I like better when machine sewing my binding down.
When you get to a corner, keep the folded edge of the binding
going straight beyond the quilt edge to the folded edge of the binding on the
next side. A natural 45 degree angle will
occur on the outer edge of the binding.
Fold the lower edge up and match the point with the edge of
the first side of the binding and allow the edge of the binding to once again
cover the straight line of stitching that is securing the binding strip.
Repeat this for each corner.
When you get back to your starting stitch, take a couple back stitches to secure the binding at the end
and you’re done!


Comments
Post a Comment